วิธีทำ ckeditor plugins แบบง่าย ๆ ติดตั้งใช้งานเอง
วิธีทำ ckeditor plugins แบบง่าย ๆ ติดตั้งใช้งานเอง
ckeditor โปรแกรมจัดการเนื้อหาบนเว็บไซต์ นอกจากความสามารถและ plugins ที่มีให้เลือกใช้มากมายแล้ว ยังเปิดให้นักพัฒนาทั่วไปสามารถพัฒนา plugin ไว้ใช้งานเองอีกด้วย ขั้นตอนการพัฒนาและติดตั้งก็ไม่ได้ยุ่งยากอะไรมากมาย ลองมาดูกันครับว่าเราจะสามารถพัฒนา ckeditor plugin ได้อย่างไร
สร้างไฟล์ plugin.js และ icon
1. สร้าง New Folder ในโฟลเด้อ plugin ของ ckeditor ตั้งชื่อให้สื่อความหมายว่า plugin ทำงานเกี่ยวกับอะไร ในบทความนี้ผมจะตั้งชื่อว่า plugin_name
รูปแสดงตัวอย่างโครงสร้าง ckeditor plugin
plugins/ชื่อปลักอินที่เราสร้าง/icons/icon.png
plugins/ชื่อปลักอินที่เราสร้าง/plugin.js
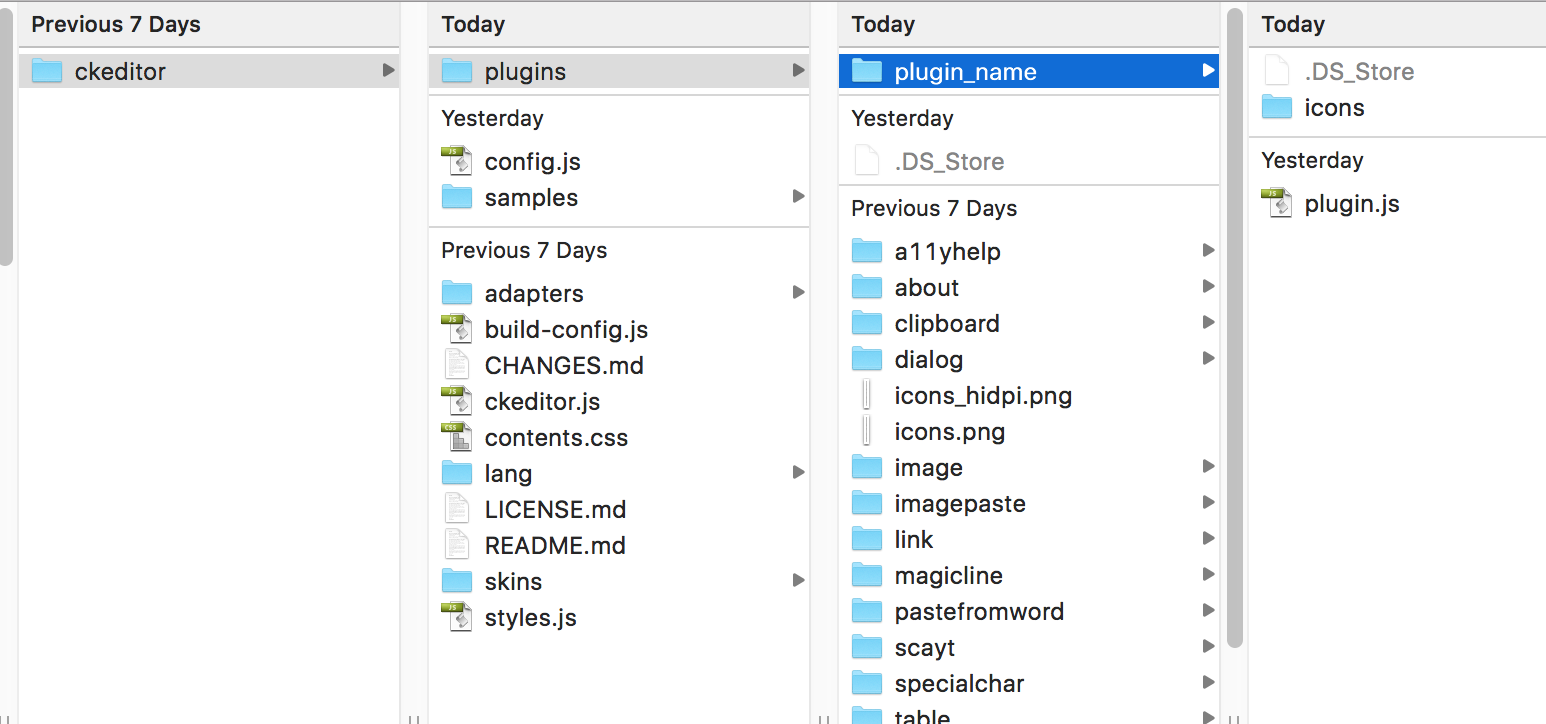
2. ในโฟลเด้อ plugin_name สร้าง New Folder ตั้งชื่อว่า icons
3. ในโฟลเด้อ icons ให้วางรูปไอคอนที่จะแสดงบน toolbar ของ ckeditor ตั้งชื่อว่า icons.png
4. ในโฟลเดื้อหลักของ plugin_name สร้างไฟล์ plugin.js และเขียนคำสั่งเพิ่ม plugin ดังนี้
CKEDITOR.plugins.add( 'plugin_name', { // ชื่อโฟลเด้อหรือชื่อ plugin
init: function( editor ) {
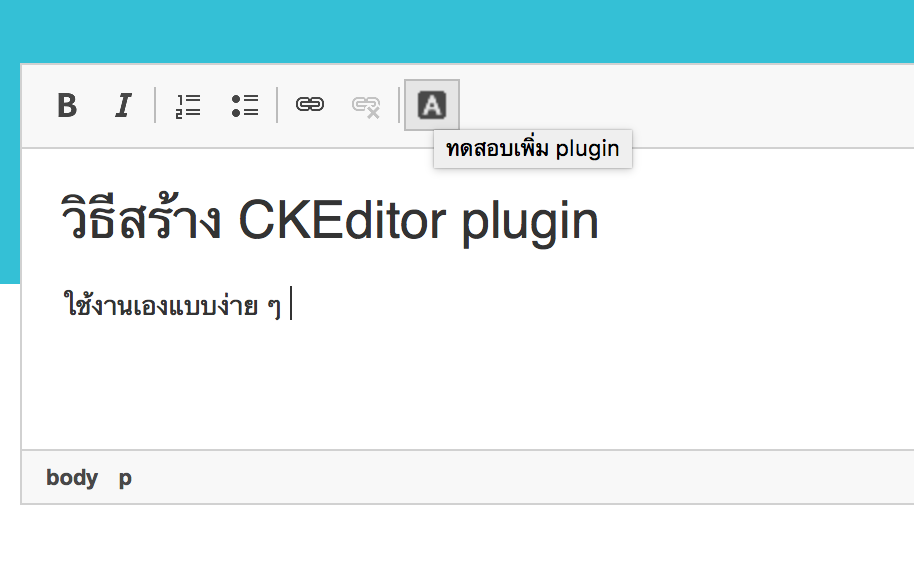
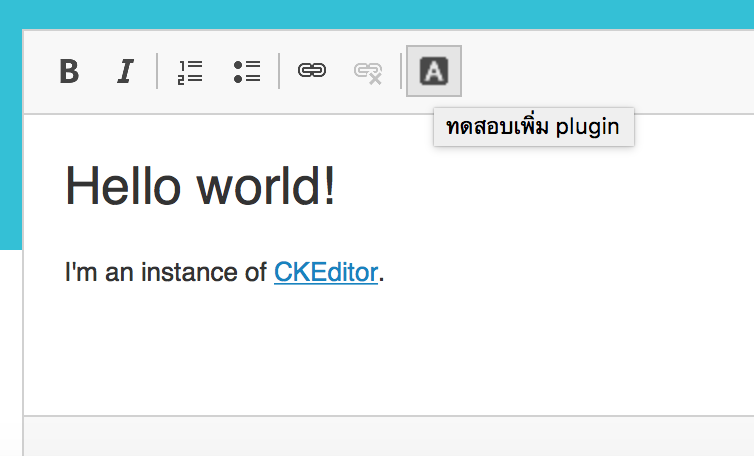
editor.ui.addButton( 'plugin_name', { // เพิ่มปุ่มไปที่ ckeditor toolbar
label: 'ทดสอบเพิ่ม plugin',
command: 'plugin_command', // event เมื่อมีการคลิกปุ่มให้ไปทำฟังก์ชั่น plugin_command
toolbar: 'tools,1',
icon: this.path + 'icons/icon.png'
});
editor.addCommand( 'plugin_command', { // เมื่อคลิกที่ปุ่มไอคอนจะทำงานฟังก์ชั่นนี้
exec: function( editor ) {
// ทำงานตรงนี้หลังจากกดปุ่ม
}
});
}
});
วิธีเปิดใช้งาน plugin
หลังจากที่ได้สร้างโครงสร้างโฟลเด้อ และไฟล์ plugin.js เรียบร้อยแล้วให้ทดลองเปิดใช้งาน plugin โดยการติดตั้ง plugin นั้นจะมีอยู่ 2 ส่วนด้วยกันคือ
1. เพิ่มการใช้งาน plugin เปิดไฟล์ config.js ของ ckeditor และเพิ่มคำสั่งใช้งาน plugin
config.extraPlugins = 'plugin_name';
2. เพิ่มปุ่มเข้าไปที่ toolbar ของ ckeditor เขียนคำสั่งที่ไฟล์ config.js ดังนี้
config.toolbar = [
	{ name: 'tools',       items : [ 'plugin_name','About' ]}
];
แต่ถ้าเราใช้งาน ckeditor จากไฟล์ sample.js ซึ่งเป็นตัวอย่างการทำงานที่ติดมาตอนดาวน์โหลดให้ไปเขียนที่ไฟล์ sample.js โดยเขียนในส่วนของ CKEDITOR.replace ดังนี้
CKEDITOR.replace( 'editor',
{
	extraPlugins : 'plugin_name',
	toolbar :
		[
			[ 'Bold', 'Italic', '-', 'NumberedList', 'BulletedList', '-', 'Link', 'Unlink' ],
			[ 'plugin_name' ]
		]
});
ตัวอย่าง plugin เมื่ออยู่บน ckeditor toolbar
วิธีเพิ่ม dialog เมื่อคลิกที่ไอคอน plugin
1. ในส่วนของ editor.ui.addButton เปลี่ยนจาก plugin_command เป็น dialog_command
command: 'dialog_command'
2. ใช้คำสั่ง addCommand เพื่อสร้างและเปิด dialog
editor.addCommand('dialog_command', new CKEDITOR.dialogCommand('dialog_command'));
3. สร้าง dialog ui โดยเขียนโค๊ดดังนี้
CKEDITOR.dialog.add( 'dialog_command', function( editor )
{
return {
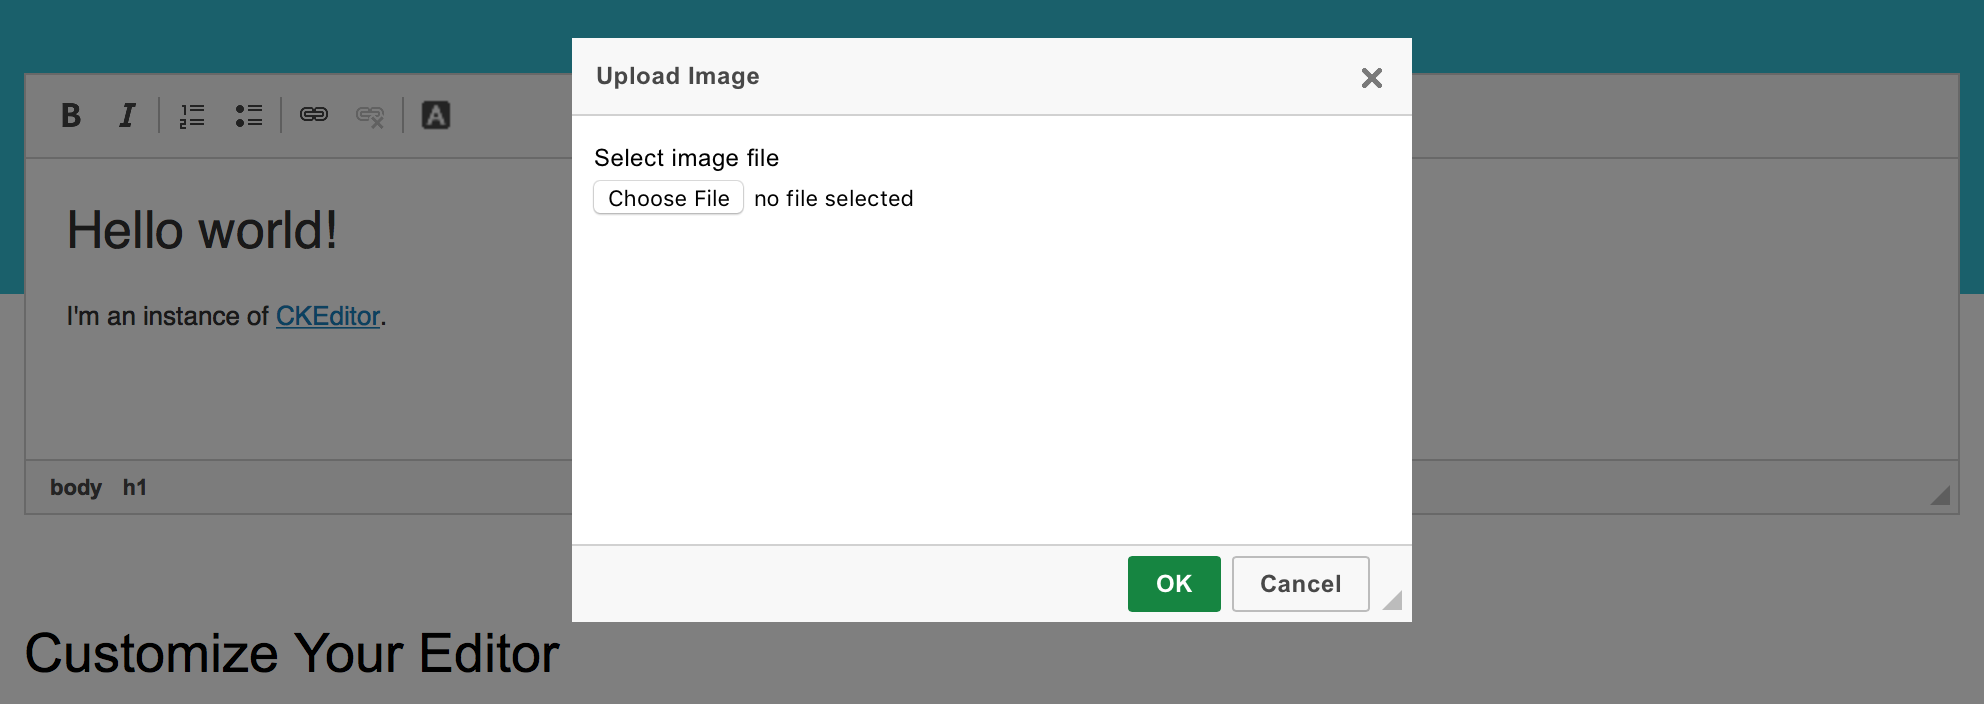
title : 'Upload Image', // ส่วนการตั้งค่าของ Window UI
minWidth : 400,
minHeight : 200,
contents : [ // ส่วนการตั้งค่าของ Tab UI
{
id : 'UploadTab',
label : 'First Tab',
title : 'First Tab',
elements : // ส่วนการตั้งค่าของ Element UI
[
{
id : 'filedata',
type : 'file',
label : 'Select image file'
}
]
}
],
buttons: [ // ปุ่มที่อยู่ใน dialog
CKEDITOR.dialog.okButton,
CKEDITOR.dialog.cancelButton
],
onOk : function() { // callback เมื่อคลิกปุ่ม OK
}
};
} );
อธิบายโค๊ดด้านบน ผมได้สร้าง dialog ขึ้นมา 1 อัน ขนาด 400x200px มีแท็บเดียว ในแท็บนั้นผมได้เพิ่ม input field สำหรับ browse file และเลือกใช้งานปุ่ม ok และ cancel ที่เป็น default ของ ckeditor
หน้าตาของ dialog ที่สร้าง